
Read input voltage from 0 to 5 Volt and the result is shown to LCD 2x16. The input voltage is connected to the Arduino A0 pin.
Hardware Requirement
- LCD 2X16 Module
- Push Button
- Arduino UNO
- Power supply +5Volt
Block diagram

Schematic
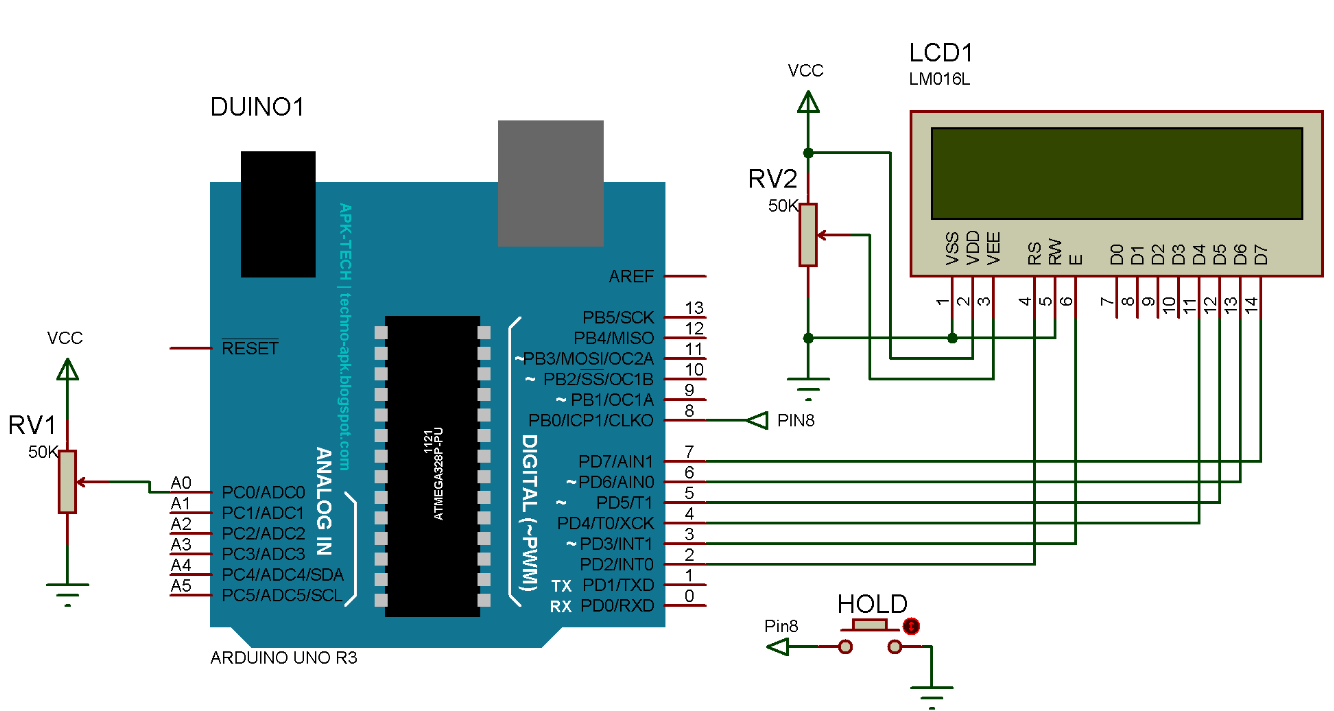
Arduino - LCD Wiring

Arduino - Button - V Input Wiring

Source Code/Sketch
#include <LiquidCrystal.h>
LiquidCrystal lcd(2, 3, 4, 5, 6, 7);
void setup(){
pinMode(8,INPUT);
digitalWrite(8,HIGH);
lcd.begin(16, 2);
lcd.setCursor(0,0);
lcd.print("DigitalVoltmeter");
lcd.setCursor(0,1);
lcd.print(" Vin mak 5Volt");
delay(3000);
lcd.clear();
}
void loop(){
int adc=(analogRead(A0));
float vin = adc * (5.0 / 1023.0);
lcd.setCursor(0,0);
lcd.print("Vin:");
lcd.print(vin);
lcd.print("V ");
if (digitalRead(8)==0){
byte hold=1;
lcd.setCursor(0,1);
lcd.print("hold on");
delay(1000);
do{
if (digitalRead(8)==0){
lcd.setCursor(0,1);
lcd.print(" ");
delay(1000);
hold=0;
}
}
while(hold);
}
delay(500);
}
How it Works
1. Connect the Arduino with Peripherals needed
2. Plug in the Power Source on the device
3. Compile and upload the script program above to your arduino
4. For variation voltage input, you can use a potentiometer
5. First look on lcd

6. Value result will be displayed on the lcd

7. If you press and hol the HOLD button, you'll see on the lcd it says hold on, and the data value will
be stuck

Video for Project I - 6. Digital Volt Meter Using LCD Display, Max 5 V (Arduino Uno Based)
Download the required file.
No comments:
Post a Comment