
Arduino UNO will be used to read analog data temperature and humidity with DS1820 temperature sensor as well as DHT11. Results from the readings will be displayed to the Nokia LCD 5110 type with display values and bar graphs. This type of LCD is like the one used on the Nokia 5110 display. The Nokia LCD has been supported by the SPI (Serial Peripheral Interface) pin, so the coding of the program is relatively easy by using SPI communication.
Spesification of Nokia 5110 LCD
- Dimension 84*48
- Vin 3,3 V
- Controller : PCD8544
Hardware Requirement
- Arduino Uno Board
- Nokia 5110 LCD
- DHT11 Sensor
- DS1820 Sensor
- Power supply +5 Volt
- Jumper
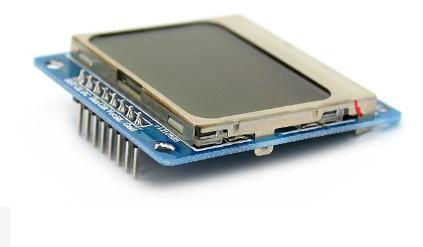


Diagram Block

Schematic

Arduino - LCD Nokia 5110 Wiring

Arduino - DS1820 Wiring

Arduino - DHT11 Wiring

Source Code/Sketch
//Celsius to Fahrenheit conversion
double Fahrenheit(double celsius)
{
return 1.8 * celsius + 32;
}
//Celsius to Kelvin conversion
double Kelvin(double celsius)
{
return celsius + 273.15;
}
double dewPoint(double celsius, double humidity)
{
double RATIO = 373.15 / (273.15 + celsius); // RATIO was originally named A0, possibly confusing in Arduino context
double SUM = -7.90298 * (RATIO - 1);
SUM += 5.02808 * log10(RATIO);
SUM += -1.3816e-7 * (pow(10, (11.344 * (1 - 1/RATIO ))) - 1) ;
SUM += 8.1328e-3 * (pow(10, (-3.49149 * (RATIO - 1))) - 1) ;
SUM += log10(1013.246);
double VP = pow(10, SUM - 3) * humidity;
double T = log(VP/0.61078); // temp var
return (241.88 * T) / (17.558 - T);
}
// delta max = 0.6544 wrt dewPoint()
// 5x faster than dewPoint()
// reference: http://en.wikipedia.org/wiki/Dew_point
double dewPointFast(double celsius, double humidity)
{
double a = 17.271;
double b = 237.7;
double temp = (a * celsius) / (b + celsius) + log(humidity/100);
double Td = (b * temp) / (a - temp);
return Td;
}
#include <dht11.h>
dht11 DHT11;
#define DHT11PIN 2
#include <OneWire.h>
#include <DallasTemperature.h>
// Data wire is plugged into port 2 on the Arduino
#define ONE_WIRE_BUS 10
// Setup a oneWire instance to communicate with any OneWire devices (not just Maxim/Dallas temperature ICs)
OneWire oneWire(ONE_WIRE_BUS);
// Pass our oneWire reference to Dallas Temperature.
DallasTemperature sensors(&oneWire);
#include <Adafruit_GFX.h>
#include <Adafruit_PCD8544.h>
// pin 7 - Serial clock out (SCLK)
// pin 6 - Serial data out (DIN)
// pin 5 - Data/Command select (D/C)
// pin 4 - LCD chip select (CS)
// pin 3 - LCD reset (RST)
Adafruit_PCD8544 display = Adafruit_PCD8544(7, 6, 5, 4, 3);
#define Backlight_Pin 9
void setup()
{
// DS18B20
sensors.begin();
// Nokia 5110 display
display.begin();
display.setContrast(50);
pinMode(Backlight_Pin, OUTPUT);
pinMode(0, INPUT);
display.clearDisplay();
display.setTextSize(1);
display.setTextColor(BLACK);
display.setCursor(0,0);
display.println("Ready");
display.display();
}
float dht11_temperature = 0;
float dht11_humidity = 0;
float ds18b20_temperature = 0;
#define TEMP_SIZE LCDWIDTH
float temp[TEMP_SIZE] = {0.0};
int temp_pos = 0; // position in circular buffer above
void loop()
{
int chk = DHT11.read(DHT11PIN);
switch (chk)
{
case DHTLIB_OK:
break;
case DHTLIB_ERROR_CHECKSUM:
break;
case DHTLIB_ERROR_TIMEOUT:
break;
default:
break;
}
dht11_humidity = (float)DHT11.humidity;
dht11_temperature = (float)DHT11.temperature;
sensors.requestTemperatures(); // Send the command to get temperatures
sensors.requestTemperatures(); // Send the command to get temperatures
ds18b20_temperature = sensors.getTempCByIndex(0);
temp[temp_pos] = ds18b20_temperature;
display.clearDisplay();
display.setCursor(0,0);
display.print(dht11_temperature, 0);
display.print("C ");
display.print(dht11_humidity, 0);
display.print("% ");
display.print(ds18b20_temperature, 2);
display.print("C");
float min = temp[0], max = temp[0];
for(int i = 0; i < TEMP_SIZE; i++) {
if (temp[i] < min && temp[i] > 0) min = temp[i];
if (temp[i] > max) max = temp[i];
}
// draw right to left so most recent value is on the right
for(int x = TEMP_SIZE - 1; x >= 0; x--) {
int pos = ( x + temp_pos + 1 ) % TEMP_SIZE;
if ( temp[pos] > 0 ) {
int y = ( ( temp[pos] - min ) / ( max - min ) ) * ( LCDHEIGHT - 10 );
display.drawLine(x, LCDHEIGHT - y, x, LCDHEIGHT, BLACK);
}
}
// refresh LCD
display.display();
// pulse display backlight
int backlight = 0;
float old_temp = temp[(temp_pos + TEMP_SIZE - 1) % TEMP_SIZE];
if ( ds18b20_temperature < old_temp ) {
backlight = 32;
} else if ( ds18b20_temperature > old_temp ) {
backlight = 255;
}
analogWrite(Backlight_Pin, backlight);
delay(2000);
if ( ++temp_pos > TEMP_SIZE ) temp_pos = 0;
}
How it Works
1. Connect the Arduino with Peripherals needed.
2. Plug in the Power Source on the device.
3. Add some library if needed
4. Compile and upload the script program above to your arduino.5. On the LCD will display the temperature and humidity values as well as display in graphical form.
Then displays the temperature / temperature values measured by the sensor.
Video for Project II - 27. Temperature and Humidity Monitoring with Bar Graphic Display on Nokia 5110 LCD based on Arduino
Required file

No comments:
Post a Comment